

Table of Contents
- Start Here: What You Need Before You Dial In Home Espresso
- Step 1: Lock In Your Dose and Puck Preparation
- Step 2: Set Your Espresso Brew Ratio and Target Yield
- Step 3: Adjust Grind Size to Hit Your Espresso Shot Time
- Step 4: Taste, Then Fine-Tune
- Using an Espresso Dial-In Chart (and Knowing When to Stop)
- Espresso Troubleshooting: A Decision Tree for Sour, Bitter and Gushing Shots
- How Beans, Roast Level and Age Change Your Settings
- Frequently Asked Questions
Last Updated: October 13, 2026
Start Here: What You Need Before You Dial In Home Espresso
Learning how to dial in home espresso comes down to four things: dose, yield, grind size, and shot time.
At Garage Roasters, we roast for consistency so you spend less time chasing settings.
Dialing in means adjusting your grinder and recipe until a shot tastes balanced, a repeatable loop, not a one-off task.
Most guides get this wrong: they change three things at once, then wonder why the shot still tastes off.
The four variables you control
- Dose: how many grams of coffee go in
- Yield: how many grams of espresso come out
- Grind size: how fine or coarse the coffee is
Everything else, bean age, water, temperature, sits on top of these four.
Step 1: Lock In Your Dose and Puck Preparation
Start with a fixed dose and stop changing it. Pick a number, weigh it every time, and keep it constant while you work on everything else.
A double shot basket usually takes 18 to 20 grams. Check what yours is rated for and stay there: rated 18 g, dose 18 g; rated 20 g, dose 20 g.
Weigh your beans on a scale, not by eye. A 0.1 g scale is enough for dosing; 0.01 g is better if you also weigh yield. Then prepare the puck the same way every time:
- Dose into the portafilter
- Level the bed with a gentle shake or a distribution tool
- Tamp straight down, firm and even
- Wipe the rim, then lock in
Consistency matters more than technique.
Why channeling ruins an otherwise good shot
Channeling is when water finds a weak path through the puck instead of flowing evenly. The shot tastes sour and bitter at once, because some grounds are under-extracted and others over-extracted.
The usual causes are a lumpy bed, a cracked puck, or a tamp that was not level. Fix your prep before you touch the grinder.
How to tell prep problems from grind problems
Most home baristas never learn this distinction, which is why people chase grind settings for weeks without improving a shot.
Signs the problem is preparation, not grind:
- The shot sprays sideways or spurts from the spouts
- The puck has visible cracks, a crater, or a sloped surface after the shot
- The flow starts unevenly, with one side of the basket darkening before the other
Signs the problem is grind or recipe:
- The flow is even across the basket but simply too fast or too slow
- The puck comes out as a clean, level cake with no cracks
- The shot tastes consistently sour or consistently bitter, not both at once
If you see prep signs, re-level and re-tamp before you make any grind adjustment. If you see grind signs, adjust the grinder one step at a time.
A repeatable puck routine
The goal is a routine so boring you could do it half asleep:
- Weigh the dose into a dosing cup or directly into the portafilter
- Break up clumps with a distribution tool or a few gentle shakes
- Level the bed by tapping the portafilter once on the bench, not by shaking it hard
- Tamp straight down until the puck stops compressing, then release without twisting
- Wipe the rim and lock in immediately
Do not tamp harder to fix a fast shot. Once the puck is fully compressed, tamp pressure has little effect. Grind size is the lever that matters.
When to suspect your basket or machine
If prep is clean and grind changes behave predictably but the shot still misbehaves, suspect equipment:
- A basket with damaged holes or a warped rim will channel no matter how well you prep
- A machine that runs too hot can make a well-prepped shot taste bitter and dry
- A machine that runs too cool can make it taste sour and thin
If you suspect retention, purge a few grams before your test shot. That habit removes one of the most common sources of confusing results.
Step 2: Set Your Espresso Brew Ratio and Target Yield
Your espresso brew ratio is the relationship between dose and yield, and the single most useful number in your recipe.
A common starting point is 1:2: 20 grams in, 40 grams out.
| Ratio | Dose | Yield | Style |
|---|---|---|---|
| 1:1.5 | 20 g | 30 g | Short, intense, syrupy |
| 1:2 | 20 g | 40 g | Standard, balanced |
| 1:2.5 | 20 g | 50 g | Longer, brighter, lighter body |
Our Ethiopian single origin runs a 1:1.65 recipe, 20 grams in and 33 grams out.

Pick a ratio. Write it down. Hit that yield on the scale every shot before you change anything else.
Step 3: Adjust Grind Size to Hit Your Espresso Shot Time
Espresso shot time is your feedback signal. Aim for roughly 25 to 30 seconds from first drip to the end of the shot, at your chosen ratio.
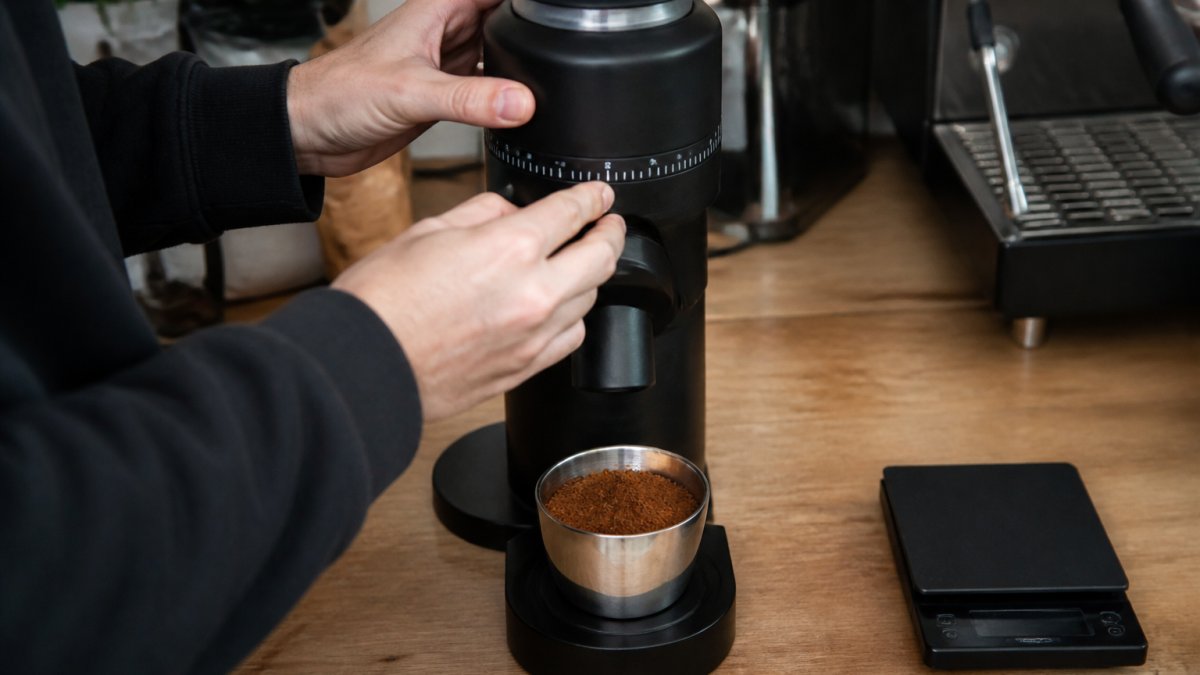
If the shot runs faster than that, grind finer. If it runs slower, grind coarser. Small moves only.
A stepless grinder lets you nudge the setting in tiny amounts, exactly what dialing in needs. Our Turin DF54 and DF83 single dose grinders use stepless adjustment with a visible metal indicator, so you can return to a setting you liked.

Here is the loop:
- Set your dose and yield
- Time the shot
- Grind finer if it ran fast, coarser if it ran slow
- Pull another shot
- Repeat until you land in the 25 to 30 second window
Then stop. Time is a guide, not the goal. Taste decides.
Step 4: Taste, Then Fine-Tune
Once your shot time is close, taste it and let your palate lead. Time gets you in the zone. Taste tells you where to go next.
Sip it. Ask three questions:
- Is it sour or sharp at the front?
- Is it bitter or drying at the back?
- Does it feel thin, or does it have body?
Under-extraction tastes sour, salty and thin. The fix is usually a finer grind, a longer shot, or a higher yield.
Fellow Espresso Series 1 Coffee Machine - Black →
Over-extraction tastes bitter, dry and harsh. Go coarser, shorten the shot, or lower the yield.
Change one thing. Pull another shot. Compare.
Using an Espresso Dial-In Chart (and Knowing When to Stop)
An espresso dial-in chart maps taste to adjustment, saving guesswork when a shot is close but not quite right.
Read it like this:
| Taste | Likely cause | Adjustment |
|---|---|---|
| Sour, thin | Under-extracted | Grind finer |
| Bitter, dry | Over-extracted | Grind coarser |
| Sour and bitter together | Channeling | Fix puck prep |
| Weak, watery | Yield too high | Lower yield |
| Harsh, overpowering | Yield too low | Raise yield |
| Fast, gushing, no body | Grind too coarse or channeling | Check prep, then grind finer |
| Slow, choking, harsh | Grind too fine | Grind coarser |
The hardest part is not reading the chart. It is knowing when to stop.
A shot log that actually helps
Most home baristas keep the recipe in their head, then forget it by the next bag. A simple log fixes that, a notebook or phone note works.
Record these fields for every test shot:
- Date
- Bean and roast date
- Dose (g)
A worked example:
| Date | Bean | Dose | Yield | Grind | Time | Taste | Next change |
|---|---|---|---|---|---|---|---|
| 12 Oct | Ethiopian, roasted 5 Oct | 20 g | 40 g | 2.4 | 22 s | Sour, thin | Grind finer to 2.2 |
| 12 Oct | Ethiopian, roasted 5 Oct | 20 g | 40 g | 2.2 | 27 s | Balanced, cocoa | Hold |
| 13 Oct | Ethiopian, roasted 5 Oct | 20 g | 40 g | 2.2 | 26 s | Balanced | Hold |
Logging does two things: you stop repeating failed adjustments, and you build a record of how a specific bean behaves, far more useful than any generic chart.
The stopping rule
A recipe is dialled in when it meets three conditions:
- It tastes balanced to you. Not perfect, not identical to a cafe shot, but balanced. No dominant sourness, no dominant bitterness, no watery finish.
- It repeats. Pull the same recipe three times in a row and get the same taste and a shot time within about two seconds each time.
- It holds across a session. The recipe still works on the next morning's first shot, not just on the shot you tuned it on.
If all three are true, stop adjusting, write the recipe down, and pull shots.
If only the first is true, you have a lucky shot, not a recipe. Repeat it before you trust it.
If only the second is true, you have a consistent shot that does not taste good. Go back to the chart and make one change.
When to re-dial
You do not need to re-dial every morning. Re-dial when one of these changes:
- A new bag of beans, even the same origin
- The roast date moves past your preferred window
- The weather turns humid and your grinder starts retaining more
Otherwise, leave the recipe alone. Tinkering with a working recipe is the most common way home baristas lose a good setting.
Espresso Troubleshooting: A Decision Tree for Sour, Bitter and Gushing Shots
Shot gushes out in under 15 seconds? Check puck prep first.
Shot chokes and barely drips? Grind coarser, a step at a time.
Shot tastes sour? Grind finer, or extend the yield slightly.
Shot tastes bitter? Grind coarser, or pull a shorter yield.
Shot sprays or spurts? That is channeling. Re-level, re-tamp, check for clumps.
Shot tastes fine but weak? Lower your yield.
Work top to bottom. One change per shot.
How Beans, Roast Level and Age Change Your Settings
Your beans move the target, so a recipe that worked last week may need a tweak today.
Three things shift your settings:
- Roast level: darker roasts dissolve faster, so they often want a coarser grind
- Origin and process: natural Ethiopians behave differently to washed Colombians
- Age: beans degas after roasting, and older beans need a finer grind
Freshness matters more than most people think. Our Ethiopian single origin is at its best from one to five weeks after the roast date.
That stability is the point of how we roast. Our methodical process, refined over thousands of research roasts, is built to reduce daily extraction tweaking.
Frequently Asked Questions
How many shots does it take to dial in espresso?
Most people reach a drinkable shot in three to five attempts, and a genuinely repeatable one in six to eight. The trick is to change only one variable per shot: keep your dose fixed, pick a brew ratio, then move grind size in small steps until the shot time lands in range. Log every shot so you can see which change produced which result instead of guessing.
What should I adjust first when espresso tastes sour or bitter?
Sour, thin shots usually mean under-extraction, so grind finer or extend the shot time. Bitter, dry, harsh shots point to over-extraction, so grind coarser or shorten the shot. Change grind size before anything else, because it shifts extraction more than dose or yield. If the shot is both sour and bitter, your puck is likely channelling and the fix is preparation, not grind.
What is a good espresso brew ratio for beginners?
Start with 1:2, so a 20 g dose produces roughly 40 g of espresso in the cup. It is forgiving, works with most medium roasts and gives you a clear baseline to taste against. Once you can repeat a 1:2 shot consistently, try 1:1.5 for a denser, sweeter result or 1:2.5 for a lighter, more acidic cup, and keep whichever you prefer.
Do I need an expensive machine to dial in espresso at home?
No, but you do need a consistent grinder, a scale that reads to 0.1 g and a timer. Those three tools matter more than the machine. A grinder with stepless adjustment and low retention, such as the Turin DF54 with its 54 mm flat burrs and under 0.1 g retention, makes small grind changes predictable. Without that, you end up chasing settings that never repeat.
Chasing a perfect shot every morning gets old fast. The better path is a repeatable recipe, stable beans, and a grinder that holds its setting. Garage Roasters roasts single origins scientifically so your dialed-in recipe stays dialed in, with fully compostable packaging and a range built for consistency. Try our Ethiopian single origin, or step up to the Turin DF54 single dose grinder to make every adjustment count. Get started with Garage Roasters and pull the same great shot tomorrow.